Hair extensions are a fantastic way to add volume, length, and a touch of glamour to your natural hair. However, achieving that full, voluminous look requires proper installation techniques. Whether you're a DIY enthusiast or seeking guidance for your next salon visit, this guide will walk you through the steps to install hair extensions for maximum fullness.
Understanding Hair Extension Types
Before you start the process of installing hair extensions, it's crucial to familiarize yourself with the different types of extensions on the market. Each type comes with its own set of advantages, and selecting the right one for you hinges on several factors. Your hair texture, lifestyle, and the level of volume you're aiming for all play a significant role in making the best choice. Understanding these nuances will help ensure that you not only achieve the look you want but also maintain the health and integrity of your natural hair.
Choosing the Right Hair Extensions
When aiming for fuller hair, the importance of selecting the right type of hair extensions cannot be overstated. This choice is particularly critical for individuals with textured hair. Extensions that complement your natural hair texture can significantly enhance the overall look and feel, providing a seamless blend that looks natural. Among the various options available, Kinky Hair Extensions stand out for their ability to mimic the unique texture of naturally kinky hair. These extensions are designed to match the tight curls and coils of textured hair, allowing for a harmonious integration that enhances volume without appearing artificial.
Kinky Hair Extensions are not just about adding length; they are specifically crafted to boost volume, making your hair appear thicker and more luxurious. The natural kink in these extensions perfectly replicates the natural curl pattern, which means they blend effortlessly with your own hair. This seamless blend is essential for achieving a fuller, more natural look. With the right care and maintenance, Kinky Hair Extensions can provide a substantial volume boost, transforming thin or sparse hair into a bountiful, voluminous mane that turns heads. By choosing extensions that align with your hair’s natural texture, you ensure that the added volume looks authentic and enhances your overall appearance.
Clip-In Hair Extensions
Clip In Extensions have gained popularity for their convenience and versatility, making them an excellent choice for anyone seeking a temporary boost in hair volume. They offer a quick and easy way to transform your look without the long-term commitment of other extension types.
Step-by-Step Installation:
- Prepare Your Hair: Start by washing and drying your hair thoroughly to ensure it is clean and free from oils or residues that could affect the grip of the clips. Use a brush to detangle your hair completely, removing any knots or tangles that might interfere with the smooth application of the extensions.
- Section Your Hair: To begin the installation, divide your hair into manageable sections. Start at the nape of your neck and work your way up. Use clips to secure the top layers of your hair out of the way, creating a clear and organized workspace. This methodical approach ensures that the extensions are applied evenly and securely.
- Attach the Extensions: Take your first clip-in weft and open the clips. Position the weft close to your scalp, and carefully snap the clips shut to secure the extension in place. It's essential to ensure the weft is lying flat against your head for a natural appearance. Continue this process, adding more wefts as you move upwards. Distribute the extensions evenly around your head to achieve a balanced and voluminous look.
- Blend the Extensions: Once all the clip-in extensions are securely attached, it's time to blend them with your natural hair. Use a brush or a wide-tooth comb to gently blend your hair with the extensions, creating a seamless and natural finish. Style your hair as desired, whether it's straightening, curling, or adding waves, to complete your voluminous new look.
Tape-In Hair Extensions
Tape-in extensions offer a fantastic solution for those seeking semi-permanent hair volume that looks natural and lasts for several weeks. These extensions are designed to provide a more durable and seamless look, making them ideal for individuals who want to enhance their hair without frequent reapplication.
Step-by-Step Installation of Tape-In Extensions
- Clean Your Hair: Begin by thoroughly washing your hair with shampoo to eliminate any oils, residues, or conditioners that might interfere with the tape's adhesion. It’s crucial that your hair is squeaky clean to ensure the extensions adhere properly and stay in place. After washing, make sure to dry your hair completely. Any moisture left can affect the stickiness of the tape, so use a blow dryer to ensure your hair is fully dry.
- Section Your Hair: Next, part your hair horizontally starting from the nape of your neck. This will be your first section. Use hair clips to secure the upper sections of your hair out of the way. Working in sections allows for a more organized and even application of the extensions. Creating neat, horizontal parts helps in achieving a balanced and natural look.
- Apply the Extensions: Now, it’s time to apply the extensions. Take one tape-in weft and carefully remove the backing to expose the adhesive side. Take a thin section of your natural hair and press the adhesive side of the extension onto it, close to the scalp. To ensure a secure hold, place another weft on top, sandwiching your natural hair between the two adhesive strips. This method provides a strong and durable bond, ensuring that the extensions stay in place.
- Repeat and Style: Continue the application process, moving up your head in horizontal sections. For each new row, part your hair, clip the upper sections out of the way, and apply the tape-in extensions as described. Once you have covered the desired areas with extensions, the final step is to blend and style your hair. Use a brush to gently blend your natural hair with the extensions, ensuring there are no visible lines or gaps. You can then style your hair as you normally would, whether that’s curling, straightening, or leaving it in its natural texture.
Sew-In Hair Extensions
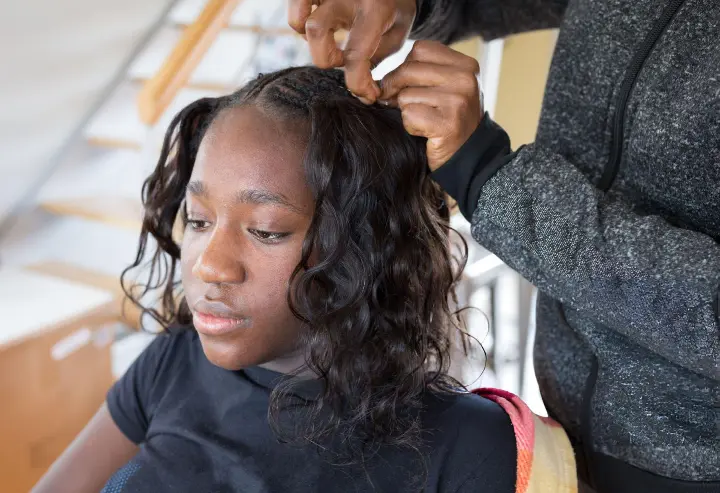
Sew-in extensions, commonly referred to as weaves, are an excellent choice for anyone looking for a long-lasting and reliable way to enhance their hair’s volume and length. This method offers durability and security, making it a favorite among those seeking a more permanent solution to thin or short hair. Here’s a detailed, step-by-step guide to installing sew-in extensions:
Step-by-Step Installation:
- Prepare Your Hair: Begin by thoroughly washing and drying your hair. Clean hair ensures a better grip for the extensions and reduces the risk of slippage. After your hair is dry, the next step is to create a solid foundation for the extensions. This involves braiding your hair into cornrows or tight braids that lie flat against your scalp. The goal is to create a sturdy base that can support the weight of the extensions without causing damage to your natural hair.
- Sew the Extensions: Once your hair is braided and secure, you can begin sewing the extensions onto the cornrows. For this step, you’ll need a curved needle and strong thread specifically designed for weaving. Start by threading the needle and tying a knot at the end of the thread. Position the weft of the extension at the base of the cornrow and carefully stitch it in place. It’s crucial to ensure that each stitch is tight and secure to prevent the extensions from loosening over time. Work your way across the braid, sewing the weft into place, and continue this process for each cornrow until all the extensions are attached.
- Blend and Style: With all the wefts securely sewn in, the next step is to blend the extensions with your natural hair for a seamless look. This may involve trimming the extensions to match your hair’s length and layers. Use a good-quality brush or comb to gently blend the natural hair with the extensions. Finally, style your hair as desired. Whether you prefer straight, curly, or wavy styles, the extensions should integrate smoothly with your natural hair, giving you the fuller, more voluminous look you desire.
Relaxed Straight Hair Bundles
If you have straight or chemically relaxed hair, Relaxed Straight Hair Bundles are an exceptional option to consider. These bundles are meticulously crafted to seamlessly blend with the texture of relaxed hair, ensuring a natural and cohesive appearance. The result is a beautifully smooth and voluminous look that enhances your hair's fullness while maintaining its sleekness. By choosing Relaxed Straight Hair Bundles, you can effortlessly achieve a glamorous and polished style that complements your natural beauty.
Professional Tips for Maximum Fullness
1. Layering and Blending: Professional hairstylists often recommend layering the extensions to create a natural, voluminous look. Trim the extensions to match the layers of your natural hair, which helps in blending them seamlessly.
2. Proper Maintenance: To maintain the fullness of your extensions, regular maintenance is essential. Use sulfate-free shampoos and conditioners to keep the extensions in good condition. Avoid heavy oils and products that can weigh down the hair.
3. Avoid Overloading: While it might be tempting to add as many extensions as possible for maximum volume, it's essential to avoid overloading your natural hair. Too much weight can cause damage and discomfort. Focus on even distribution and proper installation for the best results.
4. Regular Touch-Ups: Schedule regular touch-ups with your hairstylist to ensure the extensions stay secure and maintain their fullness. For tape-in and sew-in extensions, touch-ups every 6-8 weeks are recommended.
Conclusion
Achieving fuller hair with hair extensions is an art that requires the right technique and a bit of practice. By choosing the appropriate type of extension, following proper installation steps, and maintaining your extensions correctly, you can enjoy a voluminous, natural look. Whether you opt for clip-ins, tape-ins, or sew-ins, the key to maximum fullness lies in careful application and regular care. So, embrace the volume and let your hair shine with confidence!